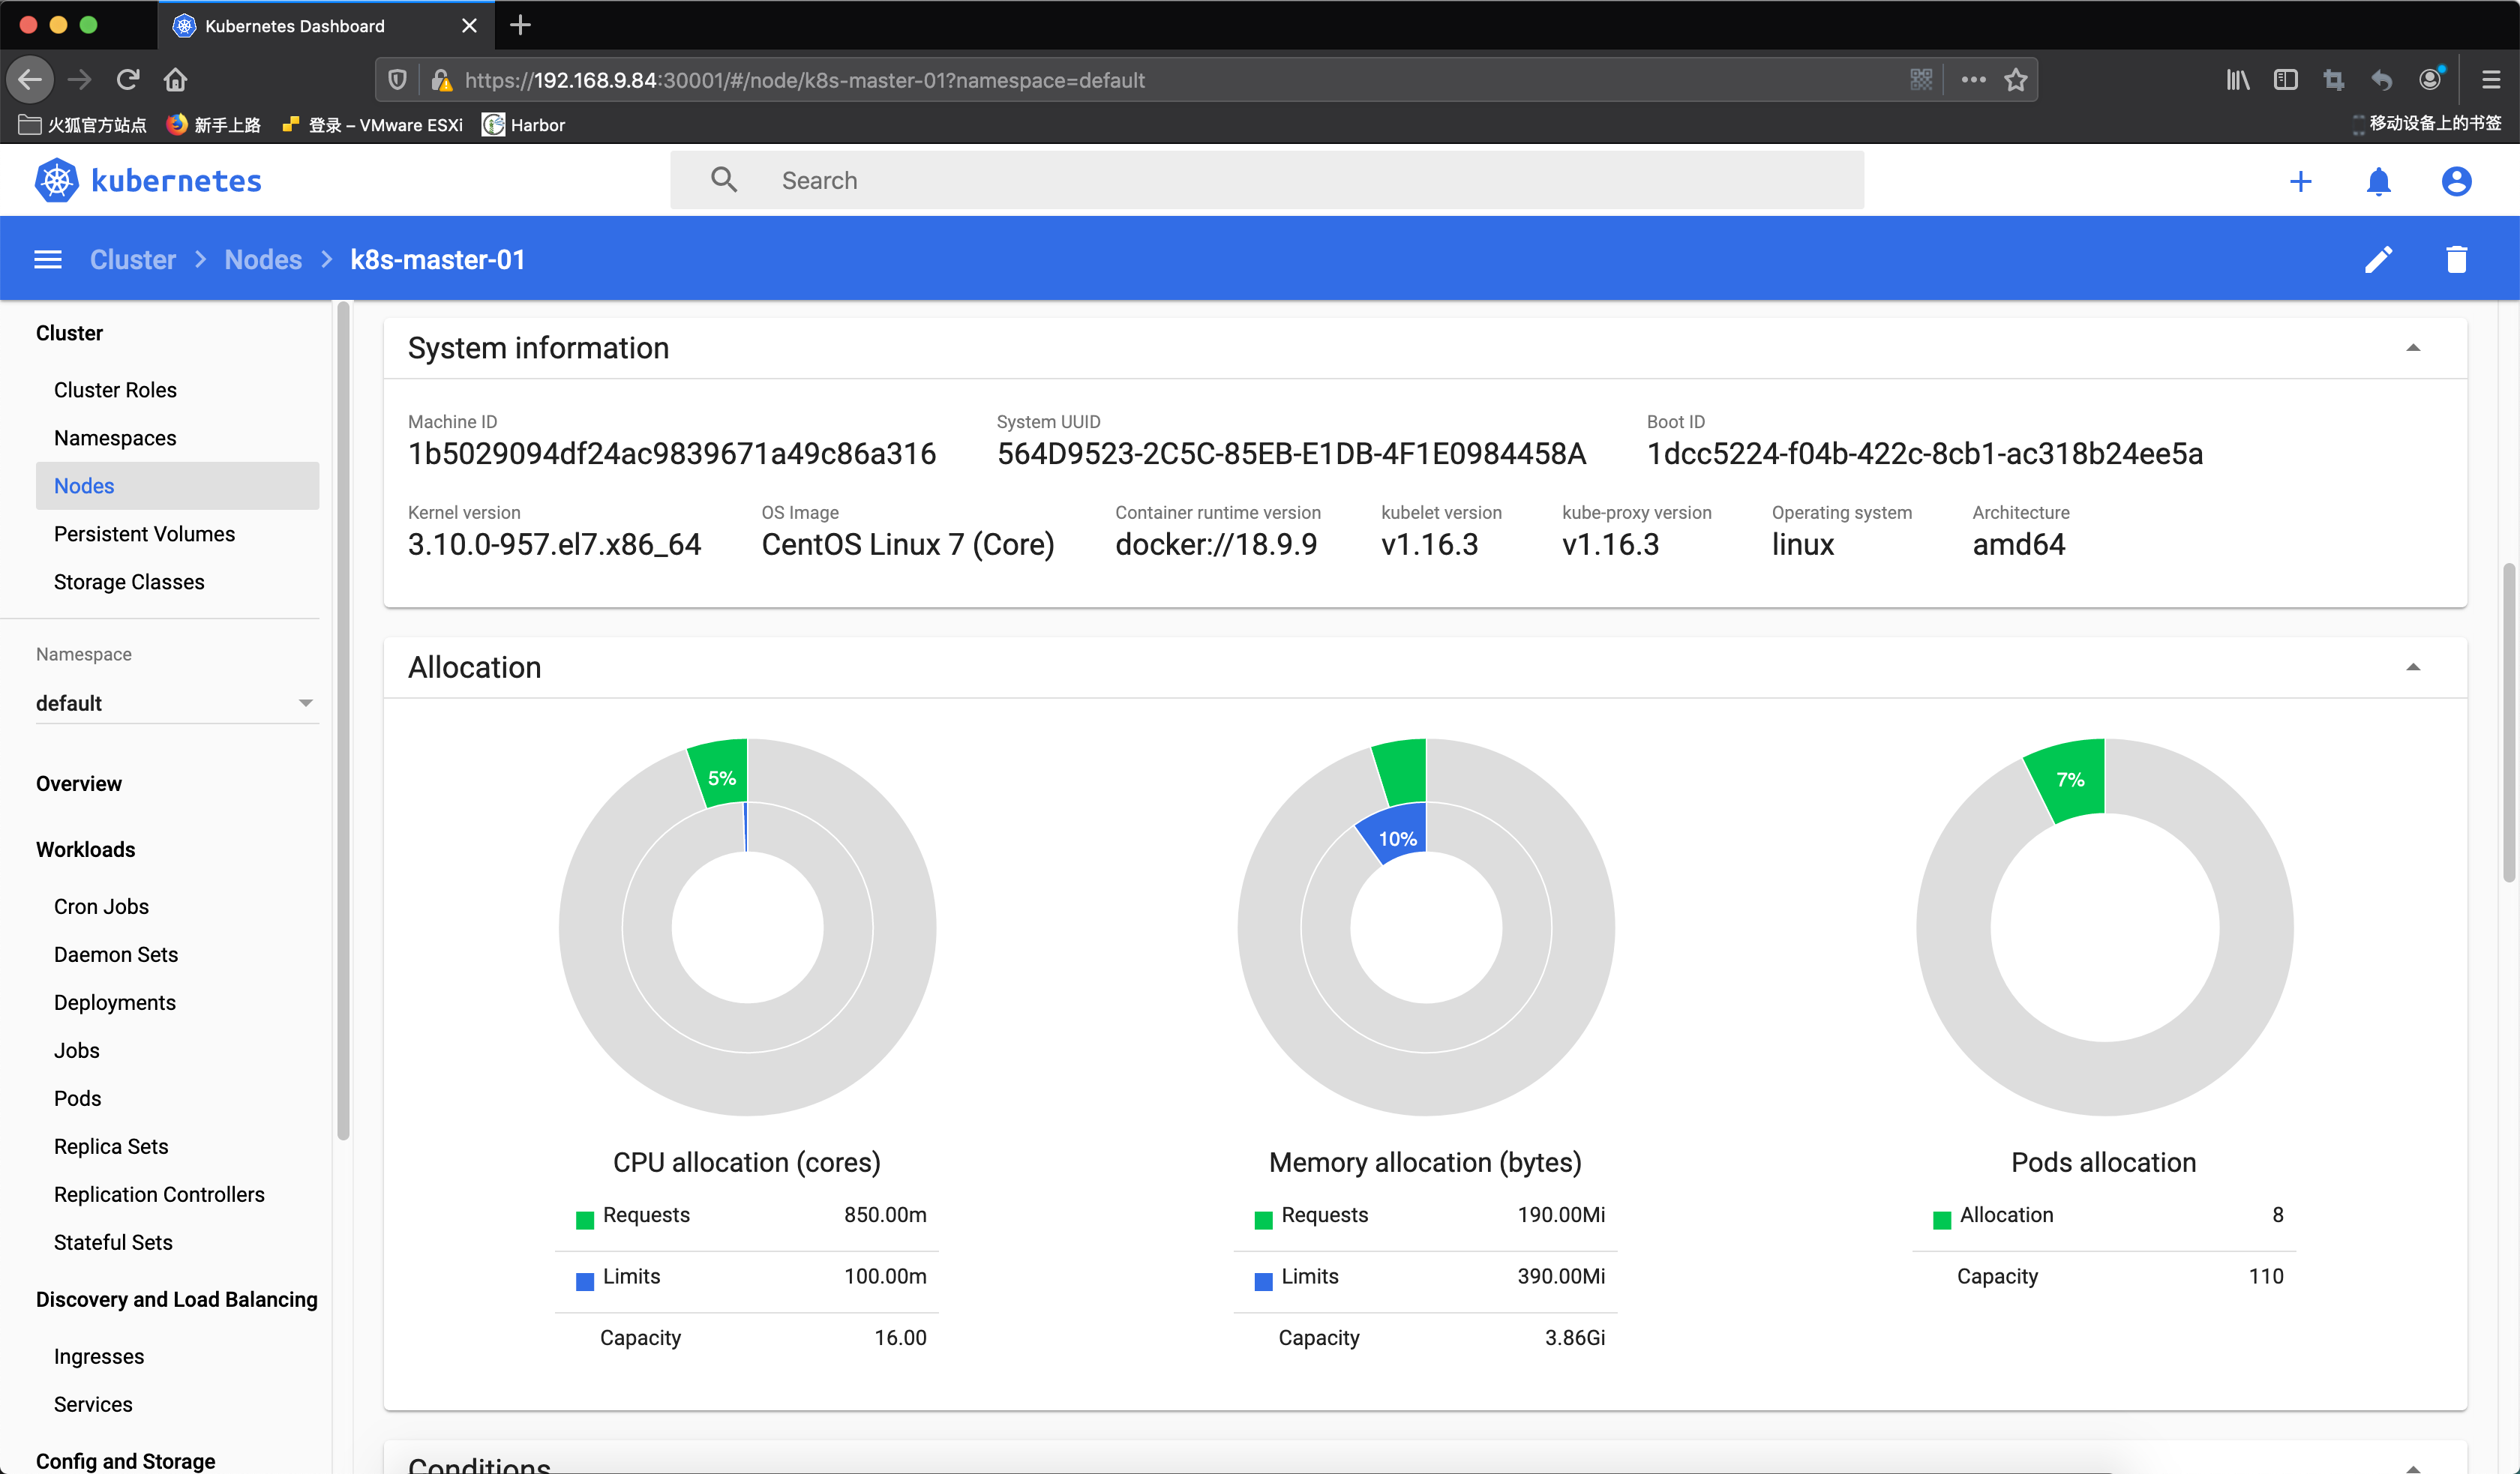
使用kubeadm搭建高可用k8s v1.16.3集群
部署环境说明
本文通过kubeadm搭建一个高可用的k8s集群,kubeadm可以帮助我们快速的搭建k8s集群,高可用主要体现在对master节点组件及etcd存储的高可用,文中使用到的服务器ip及角色对应如下:
| 主机名称 | ip地址 | 角色 |
|---|---|---|
| - | 192.168.9.80 | 虚拟ip(vip) |
| k8s-master-01 | 192.168.9.81 | master |
| K8s-master-02 | 192.168.9.82 | master |
| K8s-master-03 | 192.168.9.83 | master |
| k8s-node-01 | 192.168.9.84 | node |
| K8s-node-02 | 192.168.9.85 | node |
| K8s-node-03 | 192.168.9.79 | node |
集群架构及部署准备工作
集群架构说明
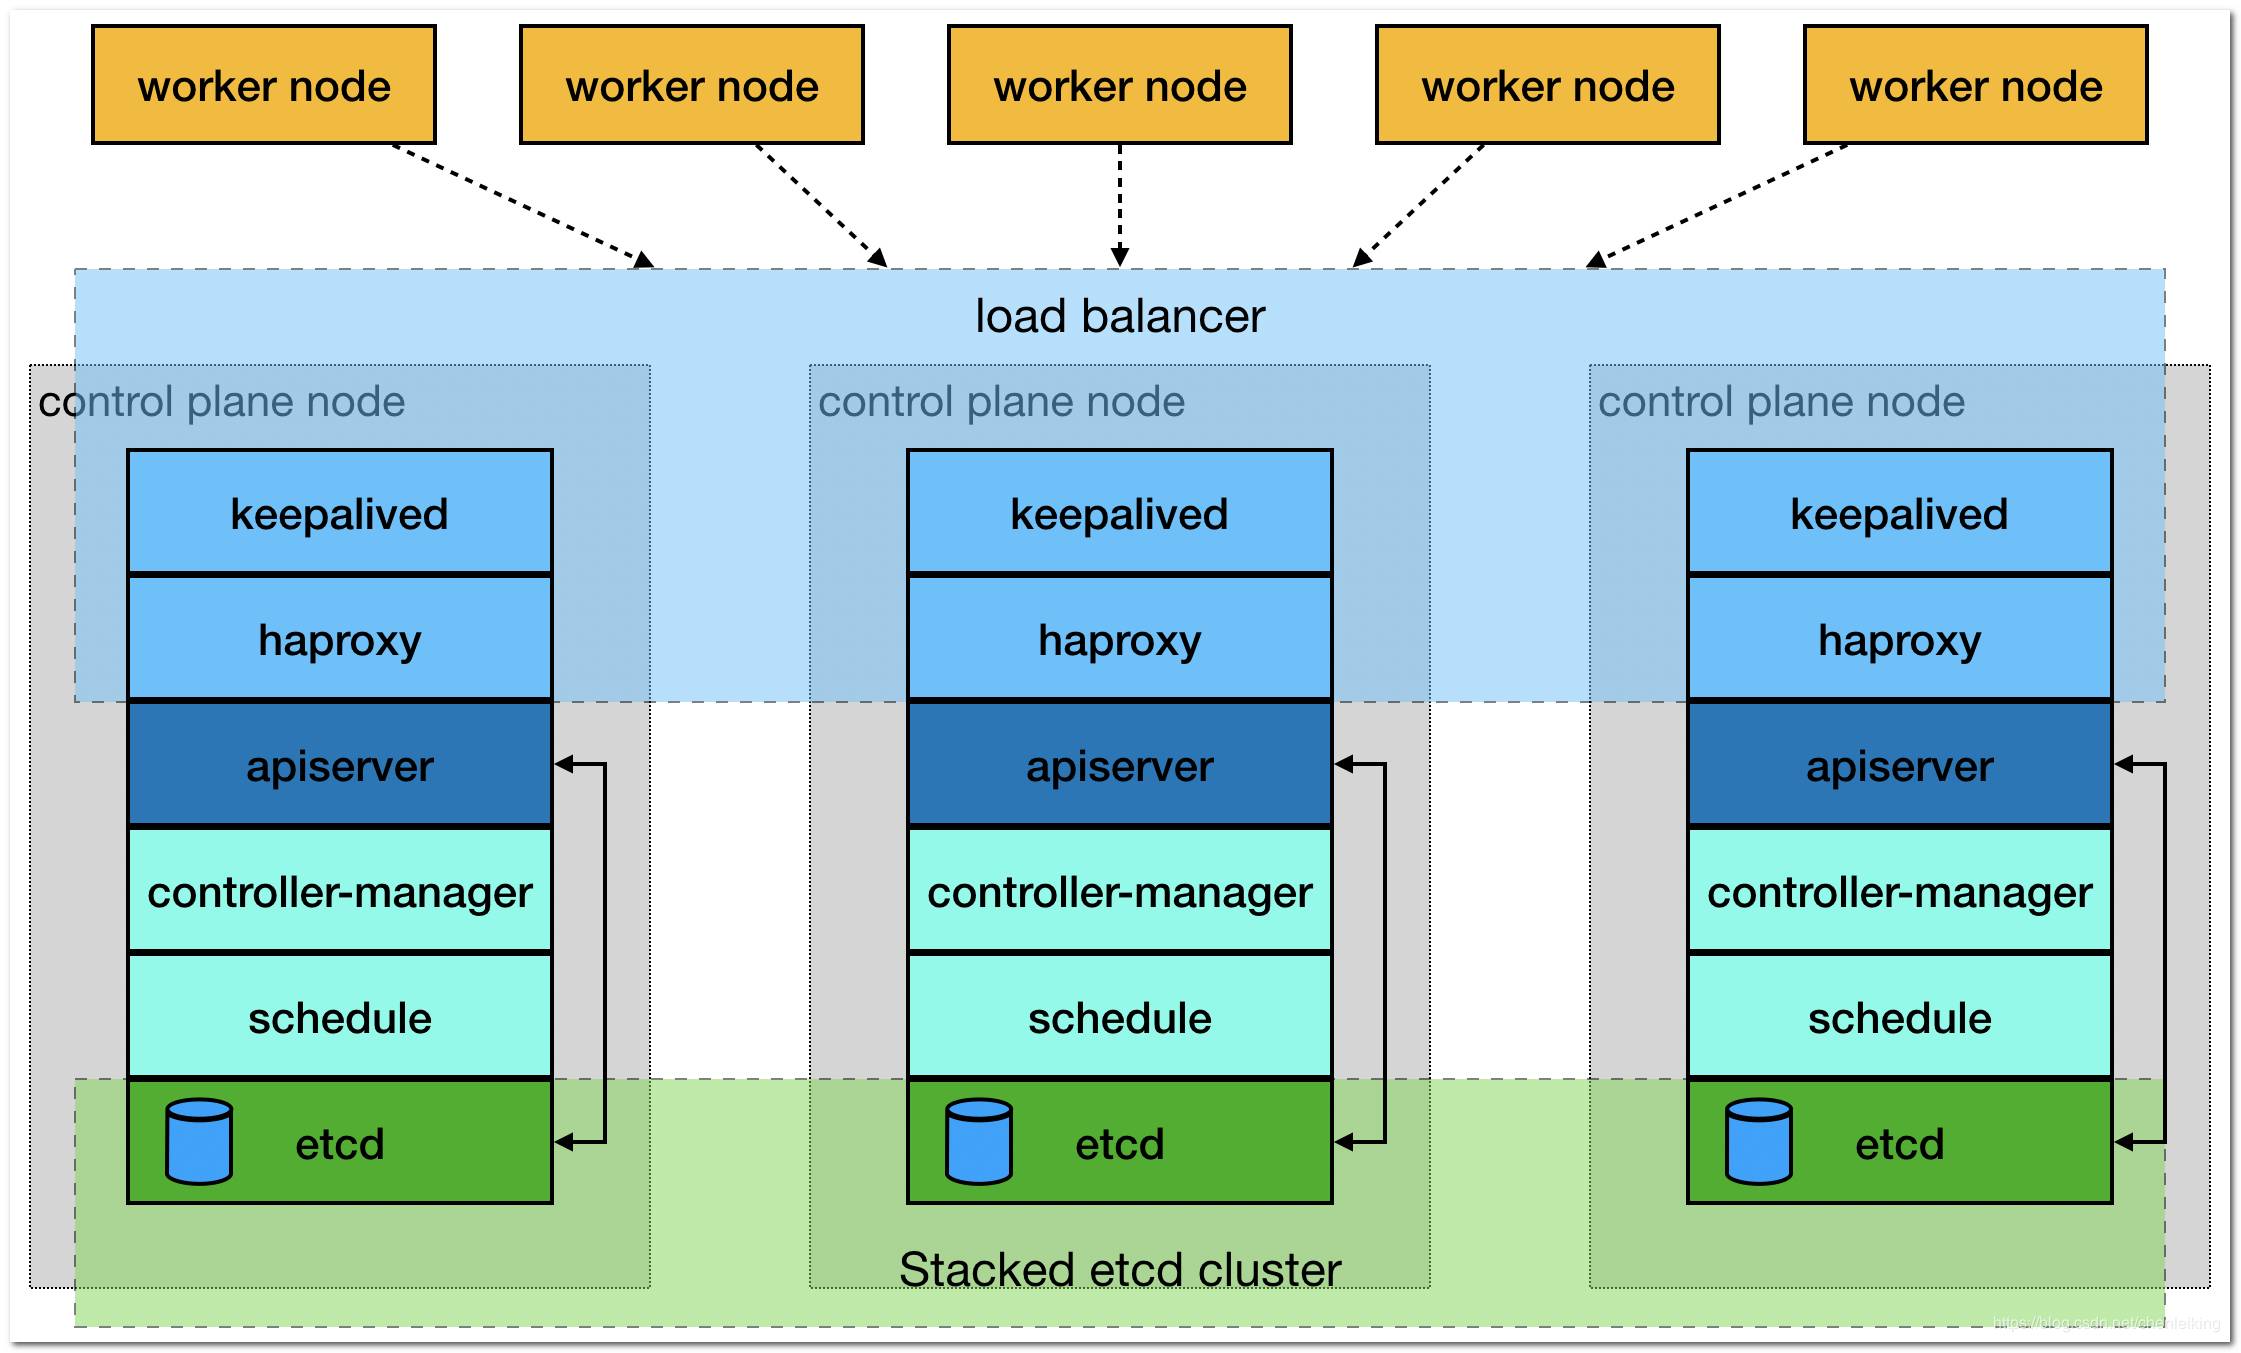
前面提到高可用主要体现在master相关组件及etcd,master中apiserver是集群的入口,搭建三个master通过keepalived提供一个vip实现高可用,并且添加haproxy来为apiserver提供反向代理的作用,这样来自haproxy的所有请求都将轮询转发到后端的master节点上。如果仅仅使用keepalived,当集群正常工作时,所有流量还是会到具有vip的那台master上,因此加上了haproxy使整个集群的master都能参与进来,集群的健壮性更强。对应架构图如下所示:
修改hosts及hostname
所有节点修改主机名和hosts文件,文件内容如下
192.168.9.80    master.k8s.io   k8s-vip
192.168.9.81    master01.k8s.io k8s-master-01
192.168.9.82    master02.k8s.io k8s-master-02
192.168.9.83    master03.k8s.io k8s-master-03
192.168.9.84    node01.k8s.io   k8s-node-01
192.168.9.85    node02.k8s.io   k8s-node-02
192.168.9.79    node03.k8s.io   k8s-node-03
其他准备
所有节点操作
-
主机时间同步 时间同步可以通过
chrony或者ntp来实现,这里不再赘述 -
关闭防火墙 关闭
centos7自带的firewalld防火墙服务 -
关闭selinux
-
禁用swap
kubeadm会检查当前主机是否禁用了swap,如果启动了swap将导致安装不能正常进行,所以需要禁用所有的swap。
# 临时关闭
$ swapoff -a && sysctl -w vm.swappiness=0
# 永久关闭,在文件中添加注释
$ vim /etc/fstab
...
UUID=7bf41652-e6e9-415c-8dd9-e112641b220e /boot                   xfs     defaults        0 0
#/dev/mapper/centos-swap swap                    swap    defaults        0 0
# 或者利用sed命令完事儿
$ sed -ri '/^[^#]*swap/s@^@#@' /etc/fstab
- 设置系统其它参数
开启路由转发
$ vim /etc/sysctl.d/k8s.conf
net.ipv4.ip_forward = 1
net.bridge.bridge-nf-call-ip6tables = 1
net.bridge.bridge-nf-call-iptables = 1
$ modprobe br_netfilter
$ sysctl -p /etc/sysctl.d/k8s.conf
net.ipv4.ip_forward = 1
net.bridge.bridge-nf-call-ip6tables = 1
net.bridge.bridge-nf-call-iptables = 1
设置资源配置文件
$ echo "* soft nofile 65536" >> /etc/security/limits.conf
$ echo "* hard nofile 65536" >> /etc/security/limits.conf
$ echo "* soft nproc 65536"  >> /etc/security/limits.conf
$ echo "* hard nproc 65536"  >> /etc/security/limits.conf
$ echo "* soft  memlock  unlimited"  >> /etc/security/limits.conf
$ echo "* hard memlock  unlimited"  >> /etc/security/limits.conf
- 安装相关包
$ yum install -y conntrack-tools libseccomp libtool-ltdl
部署keepalived
在三台master操作
安装
$ yum install -y keepalived
配置
默认的keepalived配置较复杂,这里用更为简明的方式进行配置,另外的两台master配置和上面类似,只需要修改对应的state配置为BACKUP,priority权重值不同即可,配置中的其他字段这里不做说明。
k8s-master-01的配置:
cat > /etc/keepalived/keepalived.conf <<EOF
! Configuration File for keepalived

global_defs {
   router_id k8s
}

vrrp_script check_haproxy {
    script "killall -0 haproxy"
    interval 3
    weight -2
    fall 10
    rise 2
}

vrrp_instance VI_1 {
    state MASTER
    interface eth0
    virtual_router_id 51
    priority 250
    advert_int 1
    authentication {
        auth_type PASS
        auth_pass ceb1b3ec013d66163d6ab
    }
    virtual_ipaddress {
        192.168.9.80
    }
    track_script {
        check_haproxy
    }

}
EOF
k8s-master-02的配置:
cat > /etc/keepalived/keepalived.conf <<EOF
! Configuration File for keepalived

global_defs {
   router_id k8s
}

vrrp_script check_haproxy {
    script "killall -0 haproxy"
    interval 3
    weight -2
    fall 10
    rise 2
}

vrrp_instance VI_1 {
    state BACKUP
    interface eth0
    virtual_router_id 51
    priority 200
    advert_int 1
    authentication {
        auth_type PASS
        auth_pass ceb1b3ec013d66163d6ab
    }
    virtual_ipaddress {
        192.168.9.80
    }
    track_script {
        check_haproxy
    }

}
EOF
k8s-master-03的配置:
cat > /etc/keepalived/keepalived.conf <<EOF
! Configuration File for keepalived

global_defs {
   router_id k8s
}

vrrp_script check_haproxy {
    script "killall -0 haproxy"
    interval 3
    weight -2
    fall 10
    rise 2
}

vrrp_instance VI_1 {
    state BACKUP
    interface eth0
    virtual_router_id 51
    priority 150
    advert_int 1
    authentication {
        auth_type PASS
        auth_pass ceb1b3ec013d66163d6ab
    }
    virtual_ipaddress {
        192.168.9.80
    }
    track_script {
        check_haproxy
    }

}
EOF
启动和检查
在三台master节点都启动服务
# 设置开机启动
$ systemctl enable keepalived.service
# 启动keepalived
$ systemctl start keepalived.service
# 查看启动状态
$ systemctl status keepalived.service
启动后查看k8s-master-01的网卡信息
[root@k8s-master-01 ~]# ip a s eth0
2: eth0: <BROADCAST,MULTICAST,UP,LOWER_UP> mtu 1500 qdisc mq state UP group default qlen 1000
    link/ether 00:0c:29:84:45:8a brd ff:ff:ff:ff:ff:ff
    inet 192.168.9.81/24 brd 192.168.9.255 scope global eth0
       valid_lft forever preferred_lft forever
    inet 192.168.9.80/32 scope global eth0
       valid_lft forever preferred_lft forever
    inet6 fe80::20c:29ff:fe84:458a/64 scope link
       valid_lft forever preferred_lft forever
尝试停掉k8s-master-01的keepalived服务,查看vip是否能漂移到其他的master,并且重新启动k8s-master-01的keepalived服务,查看vip是否能正常漂移回来,证明配置没有问题。
部署haproxy
在三台master操作
安装
$ yum install -y haproxy
配置
三台master节点的配置均相同,配置中声明了后端代理的三个master节点服务器,指定了haproxy运行的端口为16443等,因此16443端口为集群的入口,其他的配置不做赘述。
cat > /etc/haproxy/haproxy.cfg << EOF
#---------------------------------------------------------------------
# Global settings
#---------------------------------------------------------------------
global
    # to have these messages end up in /var/log/haproxy.log you will
    # need to:
    # 1) configure syslog to accept network log events.  This is done
    #    by adding the '-r' option to the SYSLOGD_OPTIONS in
    #    /etc/sysconfig/syslog
    # 2) configure local2 events to go to the /var/log/haproxy.log
    #   file. A line like the following can be added to
    #   /etc/sysconfig/syslog
    #
    #    local2.*                       /var/log/haproxy.log
    #
    log         127.0.0.1 local2

    chroot      /var/lib/haproxy
    pidfile     /var/run/haproxy.pid
    maxconn     4000
    user        haproxy
    group       haproxy
    daemon

    # turn on stats unix socket
    stats socket /var/lib/haproxy/stats
#---------------------------------------------------------------------
# common defaults that all the 'listen' and 'backend' sections will
# use if not designated in their block
#---------------------------------------------------------------------
defaults
    mode                    http
    log                     global
    option                  httplog
    option                  dontlognull
    option http-server-close
    option forwardfor       except 127.0.0.0/8
    option                  redispatch
    retries                 3
    timeout http-request    10s
    timeout queue           1m
    timeout connect         10s
    timeout client          1m
    timeout server          1m
    timeout http-keep-alive 10s
    timeout check           10s
    maxconn                 3000
#---------------------------------------------------------------------
# kubernetes apiserver frontend which proxys to the backends
#---------------------------------------------------------------------
frontend kubernetes-apiserver
    mode                 tcp
    bind                 *:16443
    option               tcplog
    default_backend      kubernetes-apiserver
#---------------------------------------------------------------------
# round robin balancing between the various backends
#---------------------------------------------------------------------
backend kubernetes-apiserver
    mode        tcp
    balance     roundrobin
    server      master01.k8s.io   192.168.9.81:6443 check
    server      master02.k8s.io   192.168.9.82:6443 check
    server      master03.k8s.io   192.168.9.83:6443 check
#---------------------------------------------------------------------
# collection haproxy statistics message
#---------------------------------------------------------------------
listen stats
    bind                 *:1080
    stats auth           admin:awesomePassword
    stats refresh        5s
    stats realm          HAProxy\ Statistics
    stats uri            /admin?stats
EOF
启动和检查
在三台master节点都启动服务
# 设置开机启动
$ systemctl enable haproxy
# 开启haproxy
$ systemctl start haproxy
# 查看启动状态
$ systemctl status haproxy
检查端口
[root@k8s-master-01 ~]# netstat -lntup|grep haproxy
tcp        0      0 0.0.0.0:1080            0.0.0.0:*               LISTEN      7067/haproxy
tcp        0      0 0.0.0.0:16443           0.0.0.0:*               LISTEN      7067/haproxy
udp        0      0 0.0.0.0:47041           0.0.0.0:*                           7066/haproxy
安装docker
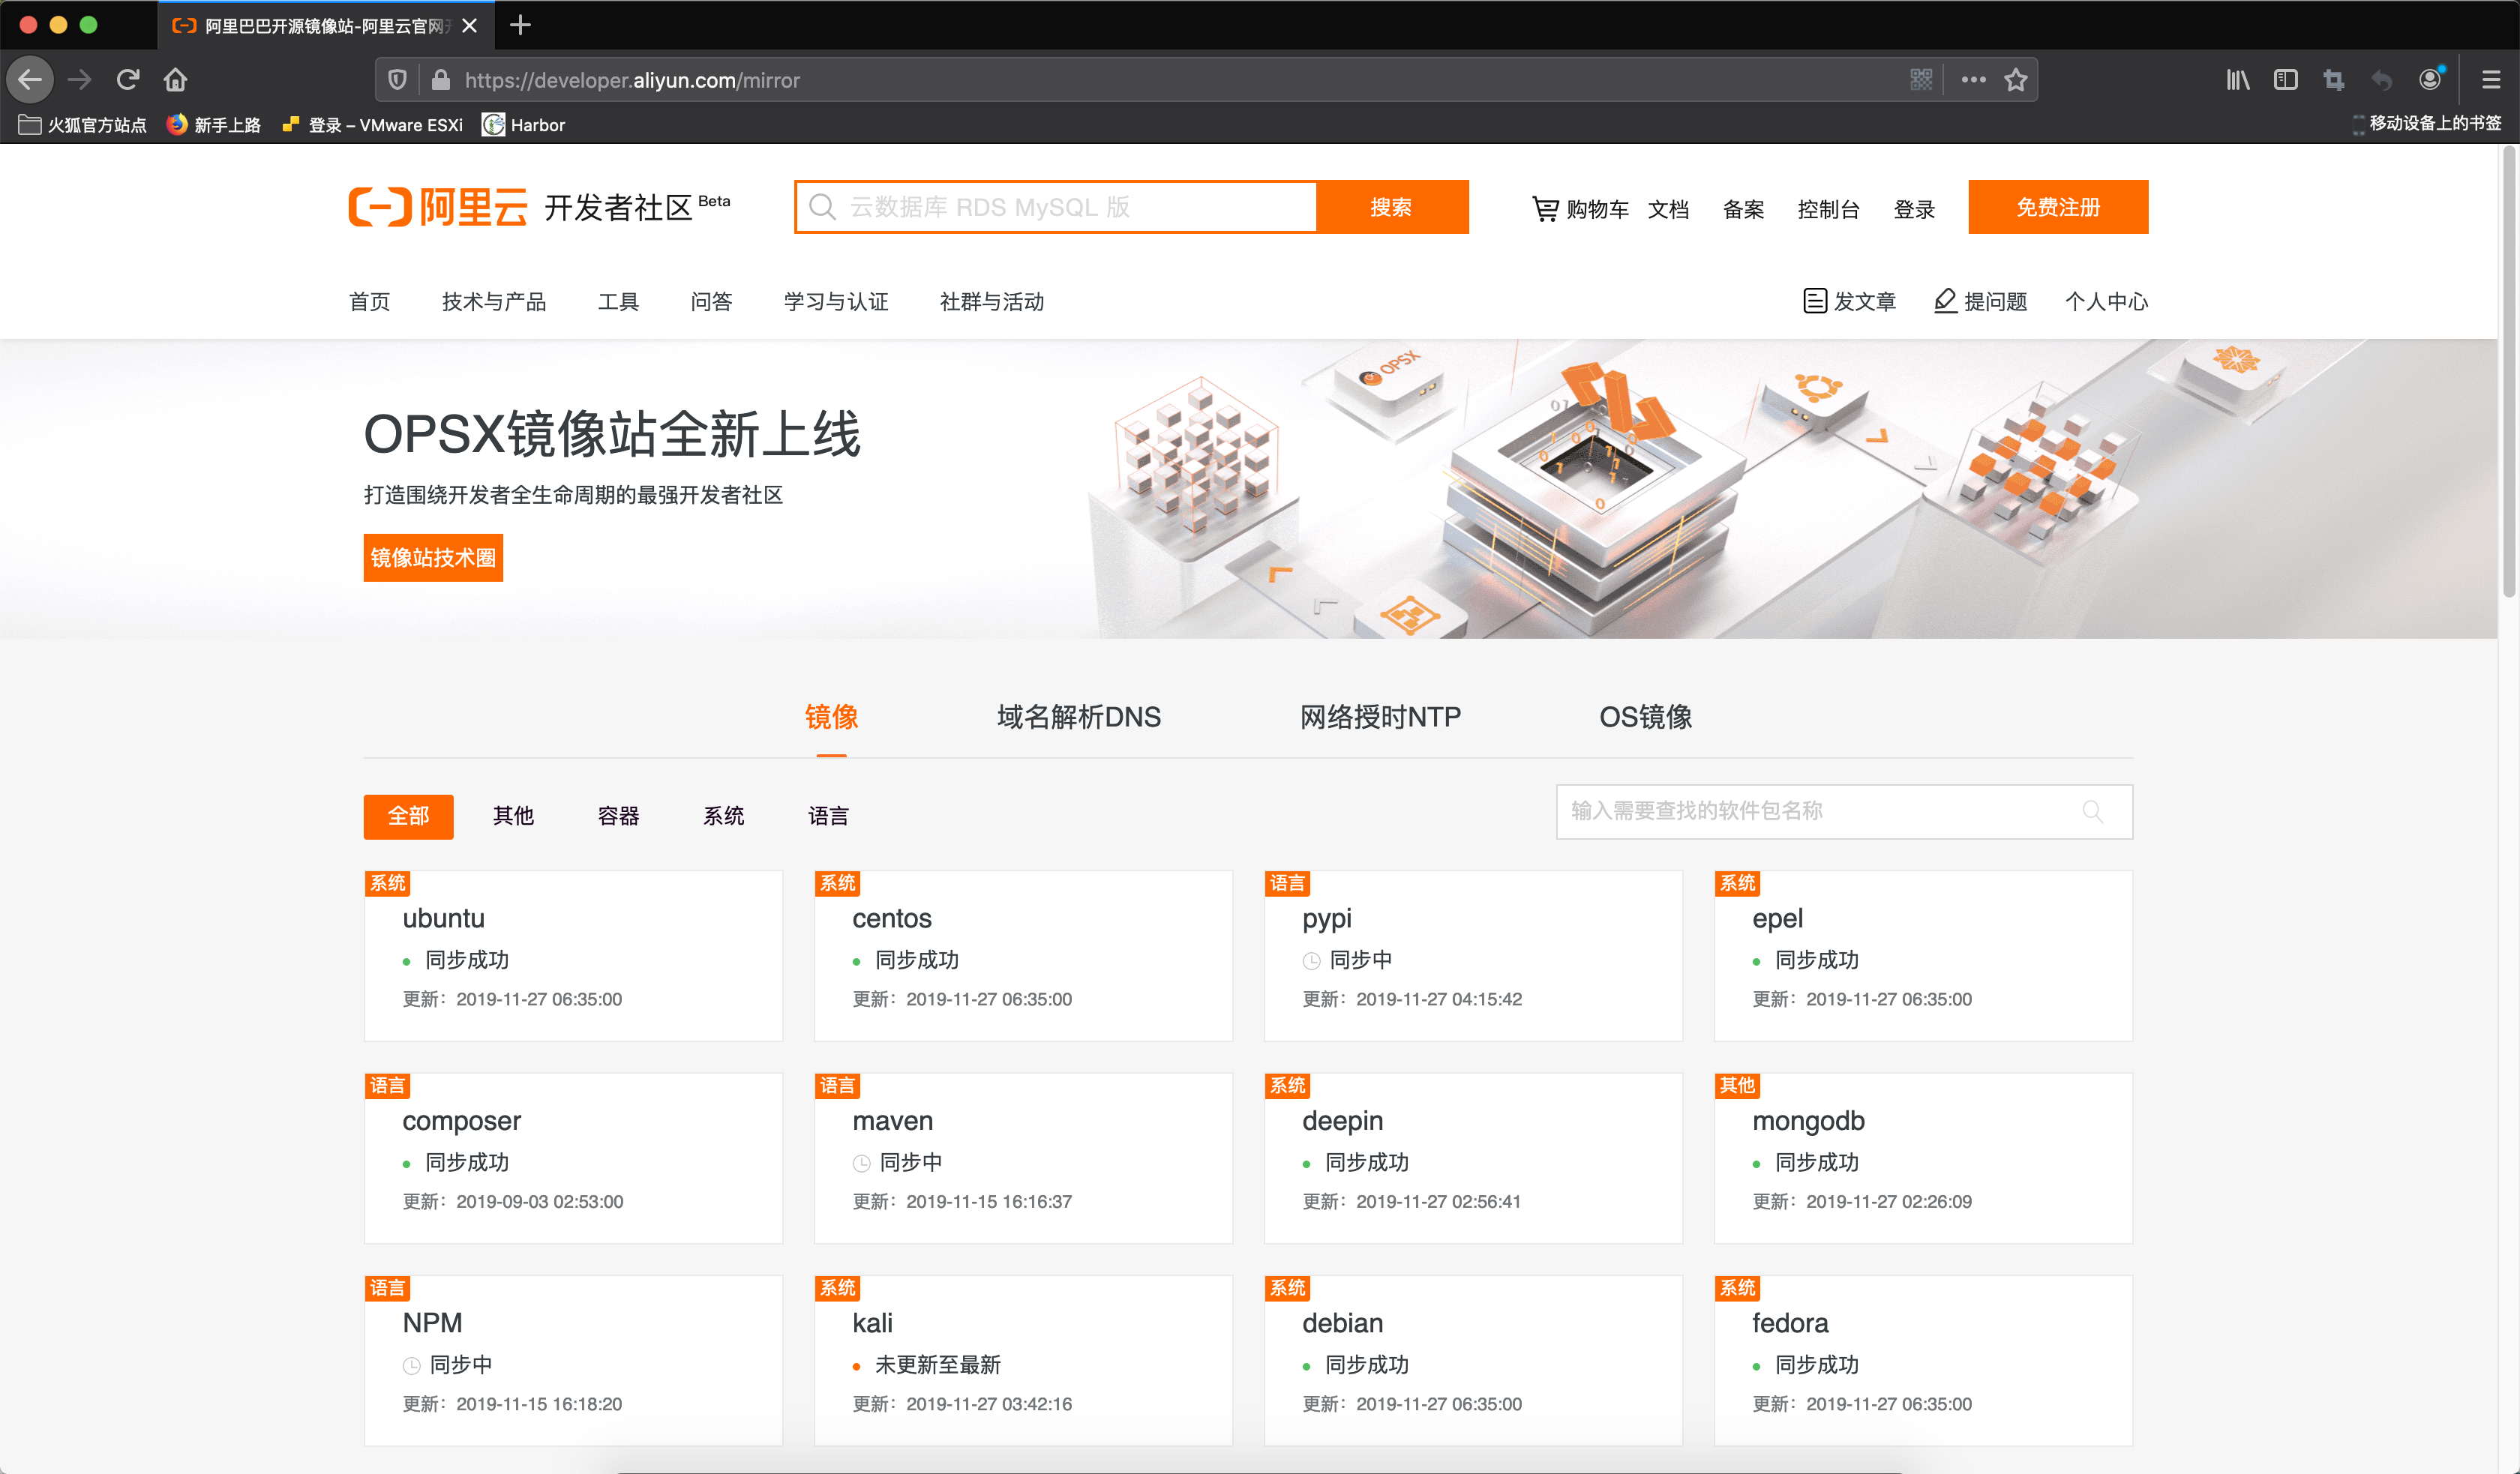
所有节点操作,使用yum安装,参考阿里云镜像站指导
今天查看阿里云镜像站时,发现已经全新改版上线了,企业免费做国内开源镜像站,点个赞
安装
# step 1: 安装必要的一些系统工具
$ yum install -y yum-utils device-mapper-persistent-data lvm2
# Step 2: 添加软件源信息
$ sudo yum-config-manager --add-repo https://mirrors.aliyun.com/docker-ce/linux/centos/docker-ce.repo
# Step 3: 查找Docker-CE的版本:
$ yum list docker-ce.x86_64 --showduplicates | sort -r
# Step 4: 安装指定版本的Docker-CE
$ yum makecache fast
$ yum install -y docker-ce-18.09.9
配置
修改docker的配置文件,目前k8s推荐使用的docker文件驱动是systemd,按照k8s官方文档可查看如何配置
$ vim /etc/docker/daemon.json
{
  "exec-opts": ["native.cgroupdriver=systemd"],
  "log-driver": "json-file",
  "log-opts": {
    "max-size": "100m"
  },
  "storage-driver": "overlay2",
  "storage-opts": [
    "overlay2.override_kernel_check=true"
  ]
}
修改docker的服务配置文件,指定docker的数据目录为外挂的磁盘--graph /data/docker
$ vim /lib/systemd/system/docker.service
ExecStart=/usr/bin/dockerd -H fd:// --containerd=/run/containerd/containerd.sock --graph /data/docker
启动
启动docker服务
$ systemctl daemon-reload
$ systemctl start docker.service
$ systemctl enable docker.service
$ systemctl status docker.service
检查docker信息
$ docker version
Client: Docker Engine - Community
 Version:           19.03.5
 API version:       1.39 (downgraded from 1.40)
 Go version:        go1.12.12
 Git commit:        633a0ea
 Built:             Wed Nov 13 07:25:41 2019
 OS/Arch:           linux/amd64
 Experimental:      false

Server: Docker Engine - Community
 Engine:
  Version:          18.09.9
  API version:      1.39 (minimum version 1.12)
  Go version:       go1.11.13
  Git commit:       039a7df
  Built:            Wed Sep  4 16:22:32 2019
  OS/Arch:          linux/amd64
  Experimental:     false
安装kubeadm,kubelet和kubectl
所有节点操作
添加阿里云k8s的yum源
cat <<EOF > /etc/yum.repos.d/kubernetes.repo
[kubernetes]
name=Kubernetes
baseurl=https://mirrors.aliyun.com/kubernetes/yum/repos/kubernetes-el7-x86_64/
enabled=1
gpgcheck=1
repo_gpgcheck=1
gpgkey=https://mirrors.aliyun.com/kubernetes/yum/doc/yum-key.gpg https://mirrors.aliyun.com/kubernetes/yum/doc/rpm-package-key.gpg
EOF
安装
$ yum install -y kubelet-1.16.3 kubeadm-1.16.3 kubectl-1.16.3
$ systemctl enable kubelet
配置kubectl自动补全
[root@k8s-master-01 ~]# source <(kubectl completion bash)
[root@k8s-master-01 ~]# echo "source <(kubectl completion bash)" >> ~/.bashrc
安装master
在具有vip的master上操作,这里为k8s-master-01
创建kubeadm配置文件
[root@k8s-master-01 ~]# mkdir /usr/local/kubernetes/manifests -p
[root@k8s-master-01 ~]# cd /usr/local/kubernetes/manifests/
[root@k8s-master-01 manifests]# vim kubeadm-config.yaml
apiServer:
  certSANs:
    - k8s-master-01
    - k8s-master-02
    - k8s-master-03
    - master.k8s.io
    - 192.168.9.80
    - 192.168.9.81
    - 192.168.9.82
    - 192.168.9.83
    - 127.0.0.1
  extraArgs:
    authorization-mode: Node,RBAC
  timeoutForControlPlane: 4m0s
apiVersion: kubeadm.k8s.io/v1beta1
certificatesDir: /etc/kubernetes/pki
clusterName: kubernetes
controlPlaneEndpoint: "master.k8s.io:16443"
controllerManager: {}
dns:
  type: CoreDNS
etcd:
  local:
    dataDir: /var/lib/etcd
imageRepository: registry.aliyuncs.com/google_containers
kind: ClusterConfiguration
kubernetesVersion: v1.16.3
networking:
  dnsDomain: cluster.local
  podSubnet: 10.244.0.0/16
  serviceSubnet: 10.1.0.0/16
scheduler: {}
初始化master节点
[root@k8s-master-01 manifests]# kubeadm init --config kubeadm-config.yaml
[init] Using Kubernetes version: v1.16.3
[preflight] Running pre-flight checks
[preflight] Pulling images required for setting up a Kubernetes cluster
[preflight] This might take a minute or two, depending on the speed of your internet connection
[preflight] You can also perform this action in beforehand using 'kubeadm config images pull'
[kubelet-start] Writing kubelet environment file with flags to file "/var/lib/kubelet/kubeadm-flags.env"
[kubelet-start] Writing kubelet configuration to file "/var/lib/kubelet/config.yaml"
[kubelet-start] Activating the kubelet service
[certs] Using certificateDir folder "/etc/kubernetes/pki"
[certs] Generating "ca" certificate and key
[certs] Generating "apiserver" certificate and key
[certs] apiserver serving cert is signed for DNS names [k8s-master-01 kubernetes kubernetes.default kubernetes.default.svc kubernetes.default.svc.cluster.local master.k8s.io k8s-master-01 k8s-master-02 k8s-master-03 master.k8s.io] and IPs [10.1.0.1 192.168.9.81 192.168.9.80 192.168.9.81 192.168.9.82 192.168.9.83 127.0.0.1]
[certs] Generating "apiserver-kubelet-client" certificate and key
[certs] Generating "front-proxy-ca" certificate and key
[certs] Generating "front-proxy-client" certificate and key
[certs] Generating "etcd/ca" certificate and key
[certs] Generating "etcd/server" certificate and key
[certs] etcd/server serving cert is signed for DNS names [k8s-master-01 localhost] and IPs [192.168.9.81 127.0.0.1 ::1]
[certs] Generating "etcd/peer" certificate and key
[certs] etcd/peer serving cert is signed for DNS names [k8s-master-01 localhost] and IPs [192.168.9.81 127.0.0.1 ::1]
[certs] Generating "etcd/healthcheck-client" certificate and key
[certs] Generating "apiserver-etcd-client" certificate and key
[certs] Generating "sa" key and public key
[kubeconfig] Using kubeconfig folder "/etc/kubernetes"
[endpoint] WARNING: port specified in controlPlaneEndpoint overrides bindPort in the controlplane address
[kubeconfig] Writing "admin.conf" kubeconfig file
[endpoint] WARNING: port specified in controlPlaneEndpoint overrides bindPort in the controlplane address
[kubeconfig] Writing "kubelet.conf" kubeconfig file
[endpoint] WARNING: port specified in controlPlaneEndpoint overrides bindPort in the controlplane address
[kubeconfig] Writing "controller-manager.conf" kubeconfig file
[endpoint] WARNING: port specified in controlPlaneEndpoint overrides bindPort in the controlplane address
[kubeconfig] Writing "scheduler.conf" kubeconfig file
[control-plane] Using manifest folder "/etc/kubernetes/manifests"
[control-plane] Creating static Pod manifest for "kube-apiserver"
[control-plane] Creating static Pod manifest for "kube-controller-manager"
[control-plane] Creating static Pod manifest for "kube-scheduler"
[etcd] Creating static Pod manifest for local etcd in "/etc/kubernetes/manifests"
[wait-control-plane] Waiting for the kubelet to boot up the control plane as static Pods from directory "/etc/kubernetes/manifests". This can take up to 4m0s
[apiclient] All control plane components are healthy after 21.505682 seconds
[upload-config] Storing the configuration used in ConfigMap "kubeadm-config" in the "kube-system" Namespace
[kubelet] Creating a ConfigMap "kubelet-config-1.16" in namespace kube-system with the configuration for the kubelets in the cluster
[upload-certs] Skipping phase. Please see --upload-certs
[mark-control-plane] Marking the node k8s-master-01 as control-plane by adding the label "node-role.kubernetes.io/master=''"
[mark-control-plane] Marking the node k8s-master-01 as control-plane by adding the taints [node-role.kubernetes.io/master:NoSchedule]
[bootstrap-token] Using token: jv5z7n.3y1zi95p952y9p65
[bootstrap-token] Configuring bootstrap tokens, cluster-info ConfigMap, RBAC Roles
[bootstrap-token] configured RBAC rules to allow Node Bootstrap tokens to post CSRs in order for nodes to get long term certificate credentials
[bootstrap-token] configured RBAC rules to allow the csrapprover controller automatically approve CSRs from a Node Bootstrap Token
[bootstrap-token] configured RBAC rules to allow certificate rotation for all node client certificates in the cluster
[bootstrap-token] Creating the "cluster-info" ConfigMap in the "kube-public" namespace
[addons] Applied essential addon: CoreDNS
[endpoint] WARNING: port specified in controlPlaneEndpoint overrides bindPort in the controlplane address
[addons] Applied essential addon: kube-proxy

Your Kubernetes control-plane has initialized successfully!

To start using your cluster, you need to run the following as a regular user:

  mkdir -p $HOME/.kube
  sudo cp -i /etc/kubernetes/admin.conf $HOME/.kube/config
  sudo chown $(id -u):$(id -g) $HOME/.kube/config

You should now deploy a pod network to the cluster.
Run "kubectl apply -f [podnetwork].yaml" with one of the options listed at:
  https://kubernetes.io/docs/concepts/cluster-administration/addons/

You can now join any number of control-plane nodes by copying certificate authorities
and service account keys on each node and then running the following as root:

  kubeadm join master.k8s.io:16443 --token jv5z7n.3y1zi95p952y9p65 \
    --discovery-token-ca-cert-hash sha256:403bca185c2f3a4791685013499e7ce58f9848e2213e27194b75a2e3293d8812 \
    --control-plane

Then you can join any number of worker nodes by running the following on each as root:

kubeadm join master.k8s.io:16443 --token jv5z7n.3y1zi95p952y9p65 \
    --discovery-token-ca-cert-hash sha256:403bca185c2f3a4791685013499e7ce58f9848e2213e27194b75a2e3293d8812
按照提示配置环境变量
[root@k8s-master-01 manifests]# mkdir -p $HOME/.kube
[root@k8s-master-01 manifests]# sudo cp -i /etc/kubernetes/admin.conf $HOME/.kube/config
[root@k8s-master-01 manifests]# sudo chown $(id -u):$(id -g) $HOME/.kube/config
查看集群状态
[root@k8s-master-01 manifests]# kubectl get cs
NAME                 AGE
scheduler            <unknown>
controller-manager   <unknown>
etcd-0               <unknown>
[root@k8s-master-01 manifests]# kubectl get pods -n kube-system
NAME                                    READY   STATUS    RESTARTS   AGE
coredns-58cc8c89f4-56n7g                0/1     Pending   0          87s
coredns-58cc8c89f4-zclz7                0/1     Pending   0          87s
etcd-k8s-master-01                      1/1     Running   0          18s
kube-apiserver-k8s-master-01            1/1     Running   0          21s
kube-controller-manager-k8s-master-01   1/1     Running   0          33s
kube-proxy-ptjjn                        1/1     Running   0          87s
kube-scheduler-k8s-master-01            1/1     Running   0          25s
执行kubectl get cs显示<unknown>是一个1.16版本已知的bug,后续官方应该会解决处理,有大佬分析了源码并且提交了pr,可点此参考
集群默认也把coredns安装了,这里处于pending状态的原因是因为还没有安装网络组件
安装集群网络
master节点操作
获取yaml
从官方地址获取到flannel的yaml
[root@k8s-master-01 manifests]# mkdir flannel
[root@k8s-master-01 manifests]# cd flannel
[root@k8s-master-01 flannel]# wget -c https://raw.githubusercontent.com/coreos/flannel/master/Documentation/kube-flannel.yml
确保yaml中的pod子网与前面执行kubeadm初始化时相同,yaml中的镜像如果无法获取,可以使用微软中国镜像源代替,例如
quay.io/coreos/flannel:v0.11.0-amd64  # 源地址
quay.azk8s.cn/coreos/flannel:v0.11.0-amd64  # 代替
安装
[root@k8s-master-01 flannel]# kubectl apply -f kube-flannel.yml
podsecuritypolicy.policy/psp.flannel.unprivileged created
clusterrole.rbac.authorization.k8s.io/flannel created
clusterrolebinding.rbac.authorization.k8s.io/flannel created
serviceaccount/flannel created
configmap/kube-flannel-cfg created
daemonset.apps/kube-flannel-ds-amd64 created
daemonset.apps/kube-flannel-ds-arm64 created
daemonset.apps/kube-flannel-ds-arm created
daemonset.apps/kube-flannel-ds-ppc64le created
daemonset.apps/kube-flannel-ds-s390x created
检查
[root@k8s-master-01 flannel]# kubectl get pods -n kube-system
NAME                                    READY   STATUS    RESTARTS   AGE
coredns-58cc8c89f4-56n7g                1/1     Running   0          20m
coredns-58cc8c89f4-zclz7                1/1     Running   0          20m
etcd-k8s-master-01                      1/1     Running   0          19m
kube-apiserver-k8s-master-01            1/1     Running   0          19m
kube-controller-manager-k8s-master-01   1/1     Running   0          19m
kube-flannel-ds-amd64-8d8bc             1/1     Running   0          51s
kube-proxy-ptjjn                        1/1     Running   0          20m
kube-scheduler-k8s-master-01            1/1     Running   0          19m
其他节点加入集群
master加入集群
复制密钥及相关文件
在第一次执行init的机器,此处为k8s-master-01上操作
复制文件到k8s-master-02
[root@k8s-master-01 ~]# ssh root@192.168.9.82 mkdir -p /etc/kubernetes/pki/etcd
[root@k8s-master-01 ~]# scp /etc/kubernetes/admin.conf root@192.168.9.82:/etc/kubernetes
admin.conf                                                                                                                                        100% 5454   465.7KB/s   00:00
[root@k8s-master-01 ~]# scp /etc/kubernetes/pki/{ca.*,sa.*,front-proxy-ca.*} root@192.168.9.82:/etc/kubernetes/pki
ca.crt                                                                                                                                            100% 1025    89.2KB/s   00:00
ca.key                                                                                                                                            100% 1675   212.1KB/s   00:00
sa.key                                                                                                                                            100% 1679   210.1KB/s   00:00
sa.pub                                                                                                                                            100%  451    56.5KB/s   00:00
front-proxy-ca.crt                                                                                                                                100% 1038   131.9KB/s   00:00
front-proxy-ca.key                                                                                                                                100% 1679   208.3KB/s   00:00
[root@k8s-master-01 ~]# scp /etc/kubernetes/pki/etcd/ca.* root@192.168.9.82:/etc/kubernetes/pki/etcd
ca.crt                                                                                                                                            100% 1017   138.8KB/s   00:00
ca.key
复制文件到k8s-master-03
[root@k8s-master-01 ~]# ssh root@192.168.9.83 mkdir -p /etc/kubernetes/pki/etcd
[root@k8s-master-01 ~]# scp /etc/kubernetes/admin.conf root@192.168.9.83:/etc/kubernetes
admin.conf                                                                                                                                        100% 5454   824.2KB/s   00:00
[root@k8s-master-01 ~]# scp /etc/kubernetes/pki/{ca.*,sa.*,front-proxy-ca.*} root@192.168.9.83:/etc/kubernetes/pki
ca.crt                                                                                                                                            100% 1025   144.6KB/s   00:00
ca.key                                                                                                                                            100% 1675   218.0KB/s   00:00
sa.key                                                                                                                                            100% 1679   245.7KB/s   00:00
sa.pub                                                                                                                                            100%  451    57.3KB/s   00:00
front-proxy-ca.crt                                                                                                                                100% 1038   132.6KB/s   00:00
front-proxy-ca.key                                                                                                                                100% 1679   213.4KB/s   00:00
[root@k8s-master-01 ~]# scp /etc/kubernetes/pki/etcd/ca.* root@192.168.9.83:/etc/kubernetes/pki/etcd
ca.crt                                                                                                                                            100% 1017    55.0KB/s   00:00
ca.key
master加入集群
分别在其他两台master上操作,执行在k8s-master-01上init后输出的join命令,如果找不到了,可以在master01上执行以下命令输出
[root@k8s-master-01 ~]# kubeadm token create --print-join-command
kubeadm join master.k8s.io:16443 --token ckf7bs.30576l0okocepg8b     --discovery-token-ca-cert-hash sha256:19afac8b11182f61073e254fb57b9f19ab4d798b70501036fc69ebef46094aba
在k8s-master-02上执行join命令,需要带上参数--control-plane表示把master控制节点加入集群
[root@k8s-master-02 ~]# kubeadm join master.k8s.io:16443 --token ckf7bs.30576l0okocepg8b     --discovery-token-ca-cert-hash sha256:19afac8b11182f61073e254fb57b9f19ab4d798b70501036fc69ebef46094aba --control-plane
[preflight] Running pre-flight checks
[preflight] Reading configuration from the cluster...
[preflight] FYI: You can look at this config file with 'kubectl -n kube-system get cm kubeadm-config -oyaml'
[preflight] Running pre-flight checks before initializing the new control plane instance
[preflight] Pulling images required for setting up a Kubernetes cluster
[preflight] This might take a minute or two, depending on the speed of your internet connection
[preflight] You can also perform this action in beforehand using 'kubeadm config images pull'
[certs] Using certificateDir folder "/etc/kubernetes/pki"
[certs] Generating "apiserver" certificate and key
[certs] apiserver serving cert is signed for DNS names [k8s-master-02 kubernetes kubernetes.default kubernetes.default.svc kubernetes.default.svc.cluster.local master.k8s.io k8s-master-01 k8s-master-02 k8s-master-03 master.k8s.io] and IPs [10.1.0.1 192.168.9.82 192.168.9.80 192.168.9.81 192.168.9.82 192.168.9.83 127.0.0.1]
[certs] Generating "apiserver-kubelet-client" certificate and key
[certs] Generating "etcd/peer" certificate and key
[certs] etcd/peer serving cert is signed for DNS names [k8s-master-02 localhost] and IPs [192.168.9.82 127.0.0.1 ::1]
[certs] Generating "etcd/healthcheck-client" certificate and key
[certs] Generating "apiserver-etcd-client" certificate and key
[certs] Generating "etcd/server" certificate and key
[certs] etcd/server serving cert is signed for DNS names [k8s-master-02 localhost] and IPs [192.168.9.82 127.0.0.1 ::1]
[certs] Generating "front-proxy-client" certificate and key
[certs] Valid certificates and keys now exist in "/etc/kubernetes/pki"
[certs] Using the existing "sa" key
[kubeconfig] Generating kubeconfig files
[kubeconfig] Using kubeconfig folder "/etc/kubernetes"
[endpoint] WARNING: port specified in controlPlaneEndpoint overrides bindPort in the controlplane address
[kubeconfig] Using existing kubeconfig file: "/etc/kubernetes/admin.conf"
[kubeconfig] Writing "controller-manager.conf" kubeconfig file
[kubeconfig] Writing "scheduler.conf" kubeconfig file
[control-plane] Using manifest folder "/etc/kubernetes/manifests"
[control-plane] Creating static Pod manifest for "kube-apiserver"
[control-plane] Creating static Pod manifest for "kube-controller-manager"
[control-plane] Creating static Pod manifest for "kube-scheduler"
[check-etcd] Checking that the etcd cluster is healthy
[kubelet-start] Downloading configuration for the kubelet from the "kubelet-config-1.16" ConfigMap in the kube-system namespace
[kubelet-start] Writing kubelet configuration to file "/var/lib/kubelet/config.yaml"
[kubelet-start] Writing kubelet environment file with flags to file "/var/lib/kubelet/kubeadm-flags.env"
[kubelet-start] Activating the kubelet service
[kubelet-start] Waiting for the kubelet to perform the TLS Bootstrap...
[etcd] Announced new etcd member joining to the existing etcd cluster
[etcd] Creating static Pod manifest for "etcd"
[etcd] Waiting for the new etcd member to join the cluster. This can take up to 40s
{"level":"warn","ts":"2019-11-27T13:33:59.913+0800","caller":"clientv3/retry_interceptor.go:61","msg":"retrying of unary invoker failed","target":"passthrough:///https://192.168.9.82:2379","attempt":0,"error":"rpc error: code = DeadlineExceeded desc = context deadline exceeded"}
[upload-config] Storing the configuration used in ConfigMap "kubeadm-config" in the "kube-system" Namespace
[mark-control-plane] Marking the node k8s-master-02 as control-plane by adding the label "node-role.kubernetes.io/master=''"
[mark-control-plane] Marking the node k8s-master-02 as control-plane by adding the taints [node-role.kubernetes.io/master:NoSchedule]

This node has joined the cluster and a new control plane instance was created:

* Certificate signing request was sent to apiserver and approval was received.
* The Kubelet was informed of the new secure connection details.
* Control plane (master) label and taint were applied to the new node.
* The Kubernetes control plane instances scaled up.
* A new etcd member was added to the local/stacked etcd cluster.

To start administering your cluster from this node, you need to run the following as a regular user:

        mkdir -p $HOME/.kube
        sudo cp -i /etc/kubernetes/admin.conf $HOME/.kube/config
        sudo chown $(id -u):$(id -g) $HOME/.kube/config

Run 'kubectl get nodes' to see this node join the cluster.

[root@k8s-master-02 ~]# mkdir -p $HOME/.kube
[root@k8s-master-02 ~]# sudo cp -i /etc/kubernetes/admin.conf $HOME/.kube/config
[root@k8s-master-02 ~]# sudo chown $(id -u):$(id -g) $HOME/.kube/config
同样的,在k8s-master-03上执行join命令,输出及后续相关的步骤同上
[root@k8s-master-03 ~]# kubeadm join master.k8s.io:16443 --token ckf7bs.30576l0okocepg8b     --discovery-token-ca-cert-hash sha256:19afac8b11182f61073e254fb57b9f19ab4d798b70501036fc69ebef46094aba --control-plane
[root@k8s-master-03 ~]# mkdir -p $HOME/.kube
[root@k8s-master-03 ~]# sudo cp -i /etc/kubernetes/admin.conf $HOME/.kube/config
[root@k8s-master-03 ~]# sudo chown $(id -u):$(id -g) $HOME/.kube/config
检查
在其中一台master上执行命令检查集群及pod状态
[root@k8s-master-01 ~]# kubectl get node
NAME            STATUS   ROLES    AGE     VERSION
k8s-master-01   Ready    master   36m     v1.16.3
k8s-master-02   Ready    master   3m20s   v1.16.3
k8s-master-03   Ready    master   21s     v1.16.3
[root@k8s-master-01 ~]# kubectl get pods --all-namespaces
NAMESPACE     NAME                                    READY   STATUS    RESTARTS   AGE
kube-system   coredns-58cc8c89f4-56n7g                1/1     Running   0          36m
kube-system   coredns-58cc8c89f4-zclz7                1/1     Running   0          36m
kube-system   etcd-k8s-master-01                      1/1     Running   0          35m
kube-system   etcd-k8s-master-02                      1/1     Running   0          3m55s
kube-system   etcd-k8s-master-03                      1/1     Running   0          56s
kube-system   kube-apiserver-k8s-master-01            1/1     Running   0          35m
kube-system   kube-apiserver-k8s-master-02            1/1     Running   0          3m55s
kube-system   kube-apiserver-k8s-master-03            1/1     Running   0          57s
kube-system   kube-controller-manager-k8s-master-01   1/1     Running   1          35m
kube-system   kube-controller-manager-k8s-master-02   1/1     Running   0          3m55s
kube-system   kube-controller-manager-k8s-master-03   1/1     Running   0          57s
kube-system   kube-flannel-ds-amd64-7hnhl             1/1     Running   1          3m56s
kube-system   kube-flannel-ds-amd64-8d8bc             1/1     Running   0          17m
kube-system   kube-flannel-ds-amd64-fp2rb             1/1     Running   0          57s
kube-system   kube-proxy-gzswt                        1/1     Running   0          3m56s
kube-system   kube-proxy-hdrq7                        1/1     Running   0          57s
kube-system   kube-proxy-ptjjn                        1/1     Running   0          36m
kube-system   kube-scheduler-k8s-master-01            1/1     Running   1          35m
kube-system   kube-scheduler-k8s-master-02            1/1     Running   0          3m55s
kube-system   kube-scheduler-k8s-master-03            1/1     Running   0          57s
node加入集群
node加入集群
分别在其他三台node节点上操作,执行join命令
在k8s-node-01上操作
[root@k8s-node-02 ~]# kubeadm join master.k8s.io:16443 --token ckf7bs.30576l0okocepg8b     --discovery-token-ca-cert-hash sha256:19afac8b11182f61073e254fb57b9f19ab4d798b70501036fc69ebef46094aba
[preflight] Running pre-flight checks
[preflight] Reading configuration from the cluster...
[preflight] FYI: You can look at this config file with 'kubectl -n kube-system get cm kubeadm-config -oyaml'
[kubelet-start] Downloading configuration for the kubelet from the "kubelet-config-1.16" ConfigMap in the kube-system namespace
[kubelet-start] Writing kubelet configuration to file "/var/lib/kubelet/config.yaml"
[kubelet-start] Writing kubelet environment file with flags to file "/var/lib/kubelet/kubeadm-flags.env"
[kubelet-start] Activating the kubelet service
[kubelet-start] Waiting for the kubelet to perform the TLS Bootstrap...

This node has joined the cluster:
* Certificate signing request was sent to apiserver and a response was received.
* The Kubelet was informed of the new secure connection details.

Run 'kubectl get nodes' on the control-plane to see this node join the cluster.
同理
[root@k8s-node-02 ~]# kubeadm join master.k8s.io:16443 --token ckf7bs.30576l0okocepg8b     --discovery-token-ca-cert-hash sha256:19afac8b11182f61073e254fb57b9f19ab4d798b70501036fc69ebef46094aba
[root@k8s-node-03 ~]# kubeadm join master.k8s.io:16443 --token ckf7bs.30576l0okocepg8b     --discovery-token-ca-cert-hash sha256:19afac8b11182f61073e254fb57b9f19ab4d798b70501036fc69ebef46094aba
检查
[root@k8s-master-01 ~]# kubectl get node
NAME            STATUS   ROLES    AGE    VERSION
k8s-master-01   Ready    master   42m    v1.16.3
k8s-master-02   Ready    master   9m3s   v1.16.3
k8s-master-03   Ready    master   6m4s   v1.16.3
k8s-node-01     Ready    <none>   31s    v1.16.3
k8s-node-02     Ready    <none>   28s    v1.16.3
k8s-node-03     Ready    <none>   38s    v1.16.3
[root@k8s-master-01 ~]# kubectl get pods --all-namespaces
NAMESPACE     NAME                                    READY   STATUS    RESTARTS   AGE
kube-system   coredns-58cc8c89f4-56n7g                1/1     Running   0          41m
kube-system   coredns-58cc8c89f4-zclz7                1/1     Running   0          41m
kube-system   etcd-k8s-master-01                      1/1     Running   0          40m
kube-system   etcd-k8s-master-02                      1/1     Running   0          9m4s
kube-system   etcd-k8s-master-03                      1/1     Running   0          6m5s
kube-system   kube-apiserver-k8s-master-01            1/1     Running   0          40m
kube-system   kube-apiserver-k8s-master-02            1/1     Running   0          9m4s
kube-system   kube-apiserver-k8s-master-03            1/1     Running   0          6m6s
kube-system   kube-controller-manager-k8s-master-01   1/1     Running   1          40m
kube-system   kube-controller-manager-k8s-master-02   1/1     Running   0          9m4s
kube-system   kube-controller-manager-k8s-master-03   1/1     Running   0          6m6s
kube-system   kube-flannel-ds-amd64-7hnhl             1/1     Running   1          9m5s
kube-system   kube-flannel-ds-amd64-8d8bc             1/1     Running   0          22m
kube-system   kube-flannel-ds-amd64-bwwlx             1/1     Running   0          33s
kube-system   kube-flannel-ds-amd64-fp2rb             1/1     Running   0          6m6s
kube-system   kube-flannel-ds-amd64-g9vdj             1/1     Running   0          40s
kube-system   kube-flannel-ds-amd64-xcbfr             1/1     Running   0          30s
kube-system   kube-proxy-485dl                        1/1     Running   0          30s
kube-system   kube-proxy-8p688                        1/1     Running   0          40s
kube-system   kube-proxy-fdq7c                        1/1     Running   0          33s
kube-system   kube-proxy-gzswt                        1/1     Running   0          9m5s
kube-system   kube-proxy-hdrq7                        1/1     Running   0          6m6s
kube-system   kube-proxy-ptjjn                        1/1     Running   0          41m
kube-system   kube-scheduler-k8s-master-01            1/1     Running   1          40m
kube-system   kube-scheduler-k8s-master-02            1/1     Running   0          9m4s
kube-system   kube-scheduler-k8s-master-03            1/1     Running   0          6m6s
集群后续扩容
默认情况下加入集群的token是24小时过期,24小时后如果是想要新的node加入到集群,需要重新生成一个token,命令如下
# 显示获取token列表
$ kubeadm token list
# 生成新的token
$ kubeadm token create
除token外,join命令还需要一个sha256的值,通过以下方法计算
openssl x509 -pubkey -in /etc/kubernetes/pki/ca.crt | openssl rsa -pubin -outform der 2>/dev/null | openssl dgst -sha256 -hex | sed 's/^.* //'
用上面输出的token和sha256的值或者是利用kubeadm token create --print-join-command拼接join命令即可
集群缩容
master节点
kubectl drain <node name> --delete-local-data --force --ignore-daemonsets
kubectl delete node <node name>
node节点
kubeadm reset
安装dashboard
部署dashboard
地址:https://github.com/kubernetes/dashboard 文档:https://kubernetes.io/docs/tasks/access-application-cluster/web-ui-dashboard/ 部署最新版本v2.0.0-beta6,下载yaml
[root@k8s-master-01 manifests]# cd /usr/local/kubernetes/manifests/
[root@k8s-master-01 manifests]# mkdir dashboard
[root@k8s-master-01 manifests]# cd dashboard/
[root@k8s-master-01 dashboard]# wget -c https://raw.githubusercontent.com/kubernetes/dashboard/v2.0.0-beta6/aio/deploy/recommended.yaml
# 修改service类型为nodeport
[root@k8s-master-01 dashboard]# vim recommended.yaml
...
kind: Service
apiVersion: v1
metadata:
  labels:
    k8s-app: kubernetes-dashboard
  name: kubernetes-dashboard
  namespace: kubernetes-dashboard
spec:
  type: NodePort
  ports:
    - port: 443
      targetPort: 8443
      nodePort: 30001
  selector:
    k8s-app: kubernetes-dashboard
...
[root@k8s-master-01 dashboard]# kubectl apply -f recommended.yaml
namespace/kubernetes-dashboard created
serviceaccount/kubernetes-dashboard created
service/kubernetes-dashboard created
secret/kubernetes-dashboard-certs created
secret/kubernetes-dashboard-csrf created
secret/kubernetes-dashboard-key-holder created
configmap/kubernetes-dashboard-settings created
role.rbac.authorization.k8s.io/kubernetes-dashboard created
clusterrole.rbac.authorization.k8s.io/kubernetes-dashboard created
rolebinding.rbac.authorization.k8s.io/kubernetes-dashboard created
clusterrolebinding.rbac.authorization.k8s.io/kubernetes-dashboard created
deployment.apps/kubernetes-dashboard created
service/dashboard-metrics-scraper created
deployment.apps/dashboard-metrics-scraper created
[root@k8s-master-01 dashboard]# kubectl get pods -n kubernetes-dashboard
NAME                                         READY   STATUS    RESTARTS   AGE
dashboard-metrics-scraper-76585494d8-62vp9   1/1     Running   0          6m47s
kubernetes-dashboard-b65488c4-5t57x          1/1     Running   0          6m48s
[root@k8s-master-01 dashboard]# kubectl get svc -n kubernetes-dashboard
NAME                        TYPE        CLUSTER-IP     EXTERNAL-IP   PORT(S)         AGE
dashboard-metrics-scraper   ClusterIP   10.1.207.27    <none>        8000/TCP        7m6s
kubernetes-dashboard        NodePort    10.1.207.168   <none>        443:30001/TCP   7m7s
# 在node上通过https://nodeip:30001访问是否正常
创建service account并绑定默认cluster-admin管理员集群角色
[root@k8s-master-01 dashboard]# vim dashboard-adminuser.yaml
apiVersion: v1
kind: ServiceAccount
metadata:
  name: admin-user
  namespace: kubernetes-dashboard
---
apiVersion: rbac.authorization.k8s.io/v1
kind: ClusterRoleBinding
metadata:
  name: admin-user
roleRef:
  apiGroup: rbac.authorization.k8s.io
  kind: ClusterRole
  name: cluster-admin
subjects:
- kind: ServiceAccount
  name: admin-user
  namespace: kubernetes-dashboard
[root@k8s-master-01 dashboard]# kubectl apply -f dashboard-adminuser.yaml
serviceaccount/admin-user created
clusterrolebinding.rbac.authorization.k8s.io/admin-user created
获取token
[root@k8s-master-01 dashboard]# kubectl -n kubernetes-dashboard describe secret $(kubectl -n kubernetes-dashboard get secret | grep admin-user | awk '{print $1}')
Name:         admin-user-token-hb5vs
Namespace:    kubernetes-dashboard
Labels:       <none>
Annotations:  kubernetes.io/service-account.name: admin-user
              kubernetes.io/service-account.uid: d699cd10-82cb-48ac-af7e-e8eea540b46e

Type:  kubernetes.io/service-account-token

Data
====
ca.crt:     1025 bytes
namespace:  20 bytes
token:      eyJhbGciOiJSUzI1NiIsImtpZCI6Ing5T2gwbFR2Wk56SG9rR2xVck5BOFhVRnRWVE0wdHhSdndyOXZ3Uk5vYkUifQ.eyJpc3MiOiJrdWJlcm5ldGVzL3NlcnZpY2VhY2NvdW50Iiwia3ViZXJuZXRlcy5pby9zZXJ2aWNlYWNjb3VudC9uYW1lc3BhY2UiOiJrdWJlcm5ldGVzLWRhc2hib2FyZCIsImt1YmVybmV0ZXMuaW8vc2VydmljZWFjY291bnQvc2VjcmV0Lm5hbWUiOiJhZG1pbi11c2VyLXRva2VuLWhiNXZzIiwia3ViZXJuZXRlcy5pby9zZXJ2aWNlYWNjb3VudC9zZXJ2aWNlLWFjY291bnQubmFtZSI6ImFkbWluLXVzZXIiLCJrdWJlcm5ldGVzLmlvL3NlcnZpY2VhY2NvdW50L3NlcnZpY2UtYWNjb3VudC51aWQiOiJkNjk5Y2QxMC04MmNiLTQ4YWMtYWY3ZS1lOGVlYTU0MGI0NmUiLCJzdWIiOiJzeXN0ZW06c2VydmljZWFjY291bnQ6a3ViZXJuZXRlcy1kYXNoYm9hcmQ6YWRtaW4tdXNlciJ9.OkhaAJ5wLhQA2oR8wNIvEW9UYYtwEOuGQIMa281f42SD5UrJzHBxk1_YeNbTQFKMJHcgeRpLxCy7PyZotLq7S_x_lhrVtg82MPbagu3ofDjlXLKc3pU9R9DqCHyid1rGXA94muNJRRWuI4Vq4DaPEnZ0xjfkep4AVPiOjFTlHXuBa68qRc-XK4dhs95BozVIHwir1W2CWhlNdfgTEY2QYJX0N1WqBQu_UWi3ay3NDLQR6pn1OcsG4xCemHjjsMmrKElZthAAc3r1aUQdCV7YNpSBajCPSSyfbMiU3mOjy1xLipEijFditif3HGXpKyYLkbuOY4dYtZHocWK7bfgGDQ
使用token登录到dashboard界面